When starting on the game, not everything went to plan, which forced us to be creative in how we planned and overcame the problems that came in our line of sight. The first problem that came when we began is that 3 of our team members never showed up for class, and also never communicated across Discord or Email, which forced a lot more work onto the remaining three team members that were still here.
Once this happened, my remaining two team members never contributed to the project, other than some words and ideas across the classroom, but never anything physically contributed to the project, which forced me to take on all of the work myself.
The Trello Page, with all of my completions in Purple
This caused me to have to rush a lot of work that I did, but also be creative, as I had to come up with fast workarounds to problems that arose in the code, as I was on the heaviest time crunch I could have possibly been on. This helped in some aspects but also lowered the overall projects quality when in comparison to projects that had fully active team members.
This was the main problem that arose, as there was no communication as the team did not do anything, and a quarter never came to class, not even for the second day of the project when the teams were picked
After completing a majority of the player code and models, I decided to try my hand at creating a realistic environment, rather than just the simple neon design that I was already using.
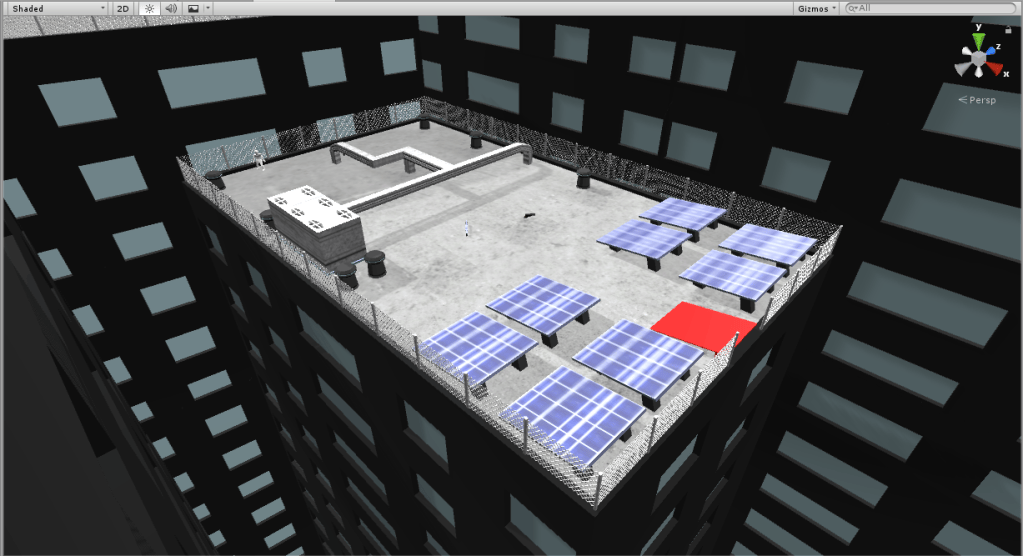
I started off by creating simple models for the cityscape that the game would take place on, such as rooftops and other misc buildings. As the player would never see the buildings edges, I took the chance to make them low poly, as it would be easier for me as well as optimising FPS, lowering the poly count.
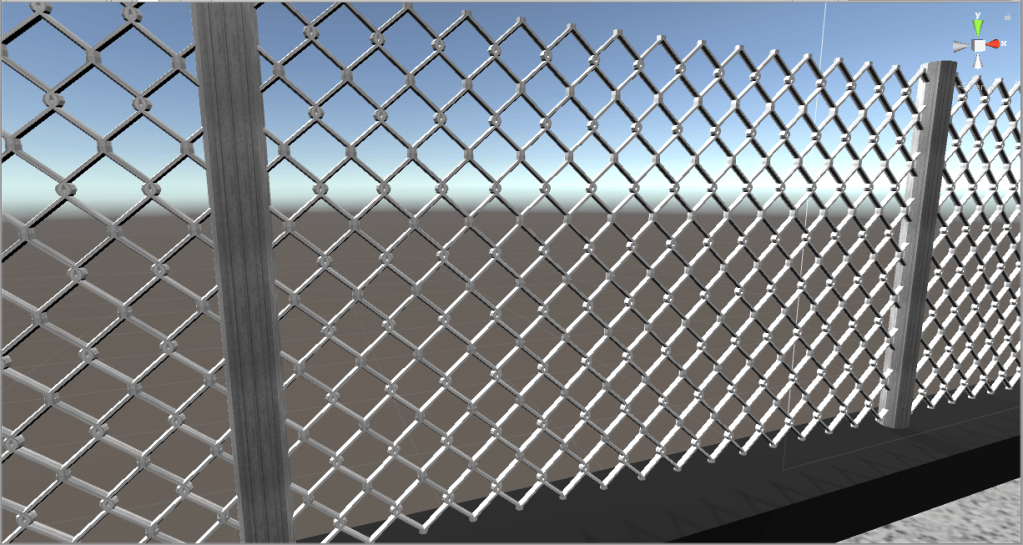
I then created individual props that would layer the rooftop as decoration, from vent shafts, chimneys, solar panels, wooden planks and chain link fences, that can be looped to create decorated rooftops.
The rooftop I created inside of the tutorial sceneThe chain link fence I created
I created this fence using a mirror modifier, as well as a curve modifier to be able to get the symmetrical bends, duplicated on top of one another , so that it creates something similar to a chain link fence.
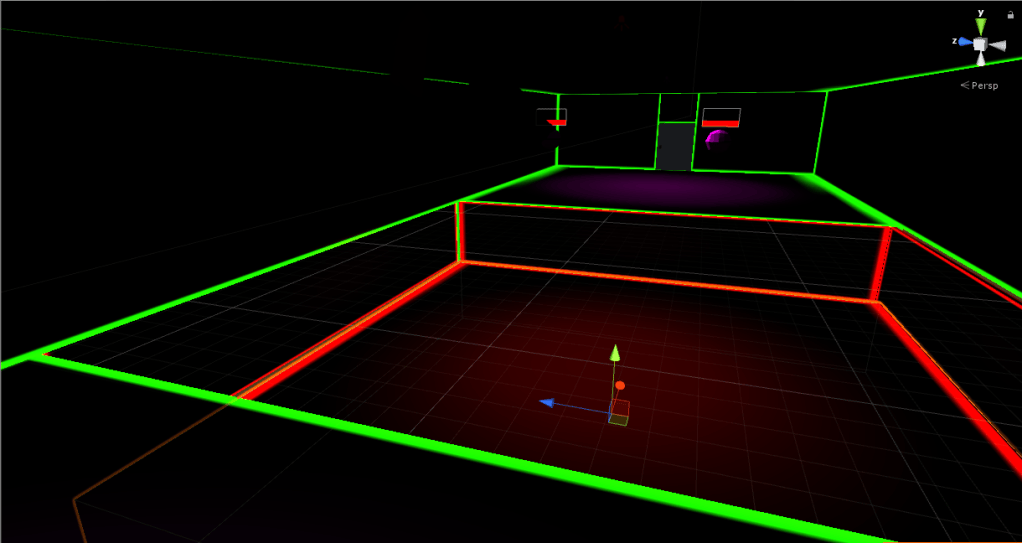
For usability, inside of the room that the users will be testing the game inside of, each wall that has specific abilities or effects are labelled with vibrant, clear colours, so that players can identify exactly where they can do what from a distance, rather than having to use trial and error to do so.
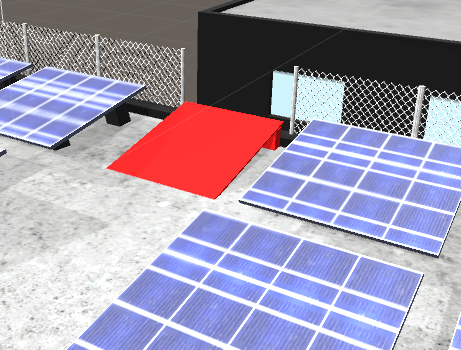
For the realistic map, this is identified by the props being bright red, with a red glow. For the neon map, all objects have different neon colours for each different movement ability that can be completed on it.
Red jump plank in the realistic sceneColour mapped walls and floors, showing what can be done where for players
If I had extra time, as I had to do all of the project solo, I would have also added colourblind options, that would have allowed you to choose which walls are what colour depending on their effect, for a fully custom experience, similar to what Blizzard Entertainments “Overwatch” does for their own colourblind options for their players in-game colours.
The player, when doing any of the movement that he has been coded to do, also has miniature animations that alter the angle of the camera, to make the movement feel more real, rather than just being attached to the wall, it makes them look as if they are diagonally running against the wall.
This is to add more feel to the game, and to make the parkour movement more realistic.
This was done by using the Unity Animator, moving the player camera to a 5 degrees tilt at certain points, using boolean changes that were attached to the movement script, updating the animation blend tree. This made sure that the camera tilted at the correct side whenever the player was on a specific wall.
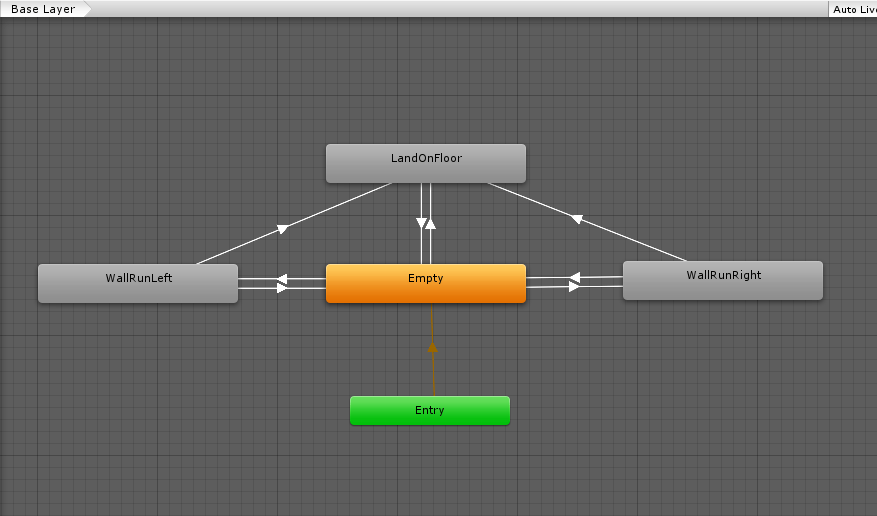
The animator sequence for tilting the players camera when wall running
Adjusting and timing the animations through boolean toggles inside of the main script for the player seemed like the most precise way to start and end animations for the player, as well as it being the way that I am must accustomed to doing inside of Unity.
Next, I had to get some animations working on the new player character that I had created for the player, so that the shadow of the character was not just a static mesh that would not look that good for the user.
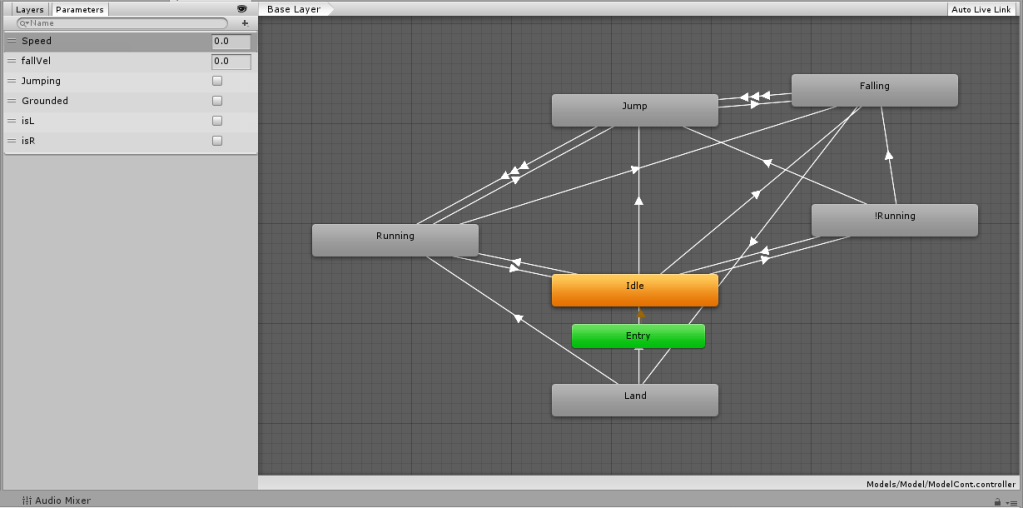
The player movement animations
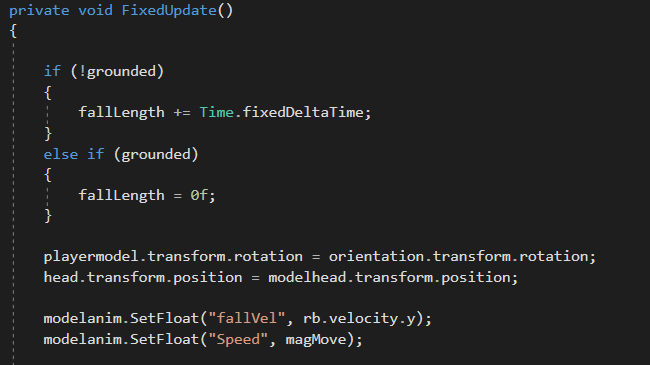
Using the same format that I had done before for the parkour animation prior, with the boolean toggles inside of the code, I did the same technique for this, although with more complex variable changes so that they change perfectly with each movement, and can go back to each one as it needs to in-game. Using animations that I received from Mixamo, the character was then fully animated, depending on if they were idle, walking, jumping, falling or landing.
To make sure that the characters animations did not interfere with what the player sees, which could cause motion sickness if done, I attached the camera to an invisible object at head level, whereas the players visible model is a separate entity parented to the player, so that it is able to do any complex or simple animations that won’t affect the players camera whatsoever, but as they are parented, their position will never change, which means that the model will always be aligned with the camera, no matter the animation, rotation etc.
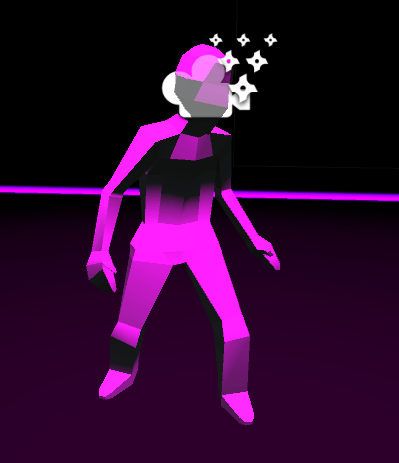
The player during idle animationAn example of the model animation variables being changed mid script.
Sadly, all of my project members failed to do anything, with the exception of Filip who made a standalone UI. I had to create all of the game as well as try blog all of my creations, while also completing my other modules work, which meant that I could not add everything that I was hoping for.
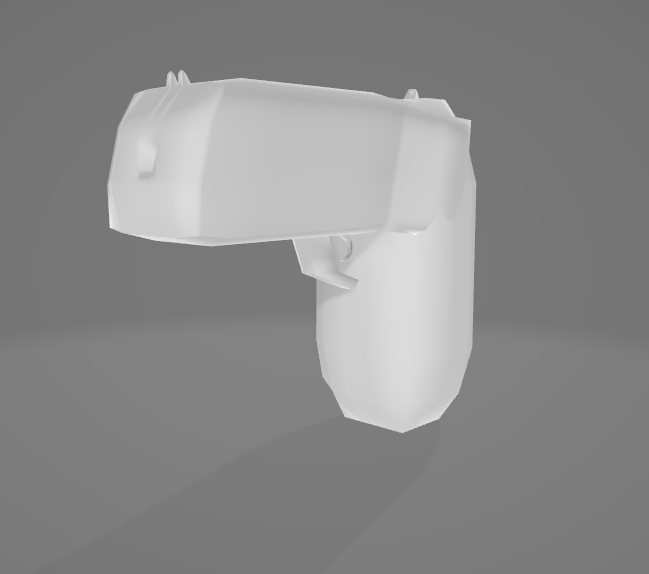
If I had extra time to polish the game, I would have added different movement abilities that I was hoping to have completed, such as a grappling gun, as well as actually enemy AI that would have followed you and attacked you. Sadly all that I managed to complete with the enemies was their models and their own health, which allows them to be killed.
I would have also finished work on a multiplayer mode, that I was testing out with Unitys multiplayer scripts, but sadly I was unable to synchronise all positions of each character and their abilities across each client, which halted progress, so I moved on to more important things for the game.
Unused model inside of the game for the grapple gun
There would have also been a lot of other possible additions that I would have gotten completed as well, such as an active end goal to the level, so that there was something for the player to strive towards, to actively be able to complete levels.
Another idea that was brainstormed at the very beginning of planning, was to have a form of skill tree, for customizable skills for different skill combinations that we had been planning, as at the time of planning, we had divided all of the work along us all, which would have potentially given us time to do it.
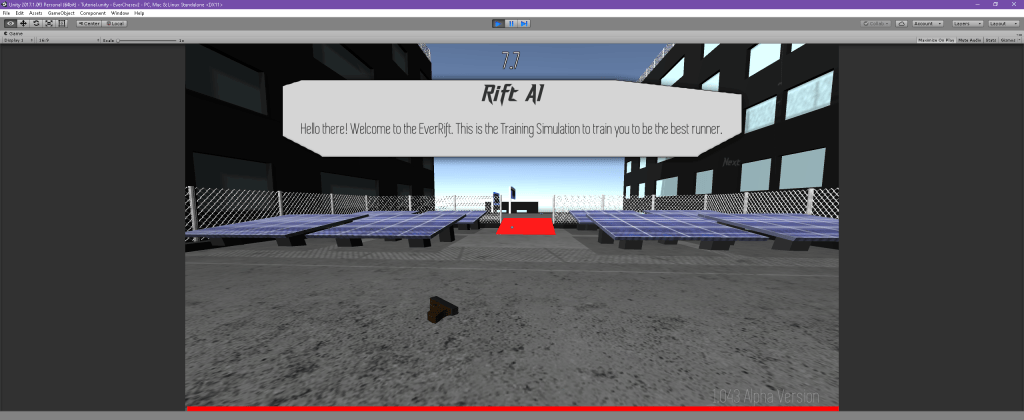
Once I had the movement of the character down, ready to be played with, I decided that a good way to introduce the character to the movement and controls, would be to add a series of text at different checkpoints in the tutorial, so that you understand what is happening and when, as well as giving a little bit of story to the game, so that it feels less 2 dimensional in the gameplay.
An example of how the text pops up onto the screen while you play.
The text slowly writes onto the screen as you play, and can be skipped by pressing the enter key, instead of using the buttons on the screen. This helps for usability as you don’t need to pause the game, to be able to move the mouse to press a next button, it can be done from the keyboard during gameplay.
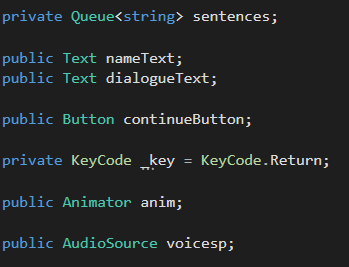
The queue variable was used to queue up the text per showing, allowing for multiple sentences to line up, ready to be shown on screen. The next two text variables are editable text boxes that can be changed inside of the game triggers, to change what the dialogue is saying and by who. The next is a button, which is no longer being used as of now. The keycode is how I mapped the enter key to be used rather than the button. The animator is so that the text can smoothly enter and leave the screen, and the audio source is to create a robot sounding voice as the text is on screen.
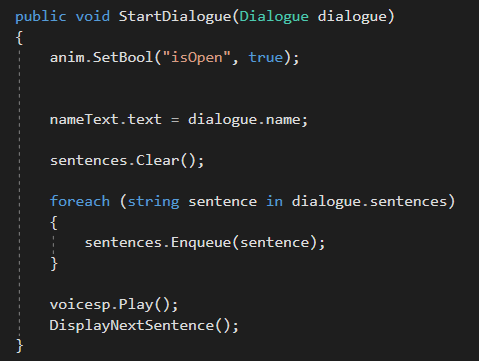
This function was called whenever the dialogue began, mapping the name of the person to the values, and clearing the queue now that a new dialogue has began. A loop is created, for every sentence that has been made in the dialogue, and then they are added to the queue. The voice line plays outside of the loop and the next function, named “DisplayNextSentence”, is called.
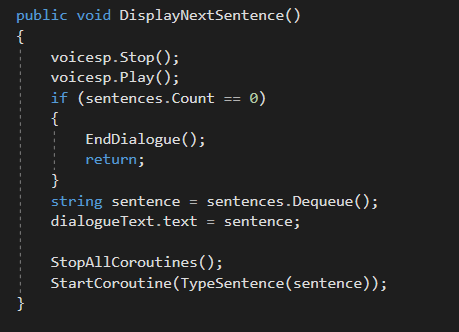
This function restarts the voice playing, and then checks if the queue of sentences is over. If it has finished, the conversation ends. If there is more conversation, then the current sentence being spoken is removed from the queue, and the typing animation co-routine is played.
As previously spoken about before, I created this system as a way to communicate certain goals and objectives to the player without actively interrupting or breaking immersion of the game. A small, stoppable text screen in certain areas is a fast and easy way to convey information to the character, as well as being easy for the player to skip if they do not wish to hear it.
The way that it has been created allows me to copy multiple of the same prefab for the voice line, adjust the collision zone and the text that is spoken, and it will be automatically queued, skipping the previously queued text and showing the newest interacted dialogue.
I decided to dedicate this week into looking into how items in the environment could be made destructible and/or interactive. So I started researching how I could make this effect through blender and import it into Unity for use inside of the game.
Through research on the Blender forums, as well as YouTube, I learnt of a Blender addon named Cell Fracture, that randomly fractures the mesh through a noise modifier, which allows me to have both a whole model, as well as a fractured model, which, when switched between fast, makes it seem that the mesh fractured when touched/attacked.
I used this through the base enemy orb I created, as well as a door model that I made, so that the door could be destroyed by using explosives or charging into it at full speed. This gave the game a good feel, as debris scatters when it explodes.
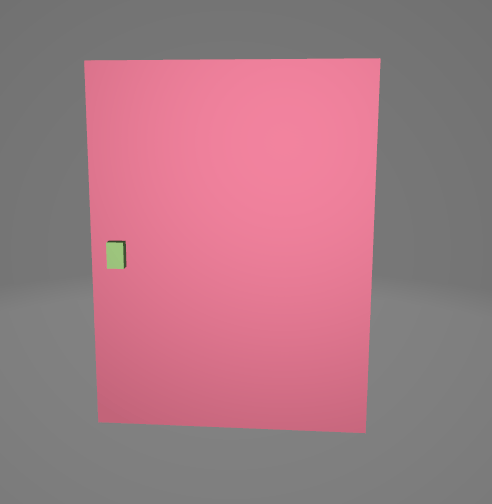
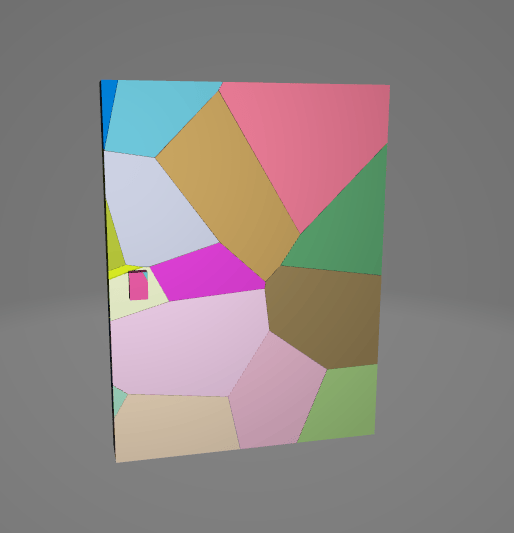
the low polygon door that I created for the use in the game with BlenderThe door after using Cell fracture to break the door apart into pieces.
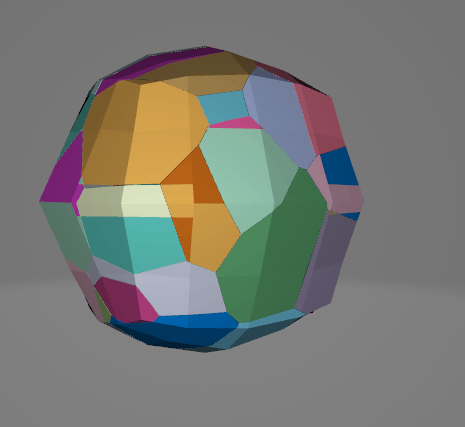
The doors are using random colours in this view to represent each individual mesh.
Each of the individual pieces has their own rigidbody and collider, allowing them to act on their own, for a sort of random debris scatter when the door breaks in the game. I like this as it makes the game feel more fluid and real, as a door would typically break if hit with explosives.
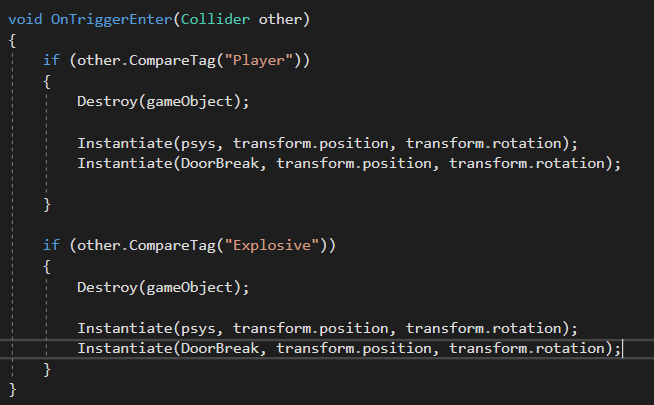
The code on the original door
This is the code that detects if an explosive, or the player has collided with the door, instancing the destroyed door in the same position as the original door, and removing said unbroken door.
Tagging it to an open tag named “Explosive” also allows me to automatically have the door interact the same way with any other explosives, so long as I tag them with the Explosive tag.
a temporary enemy ballThe ball shattered, showing each mesh as a different colour
Now that I have all of the 3D Models for the weapons, it was time to actually create scripts so that the player can launch projectiles, instantiating at the players head, then shooting out in the players looking direction, at a certain velocity to imitate a bullet. Each weapon needs to have different speed and shot delay, and I need to create a script that only allows one gun to be equipped at one time until the player chooses to drop that specific gun. That means I need a weapon manager script, as well as a script for each gun and each different bullet type.
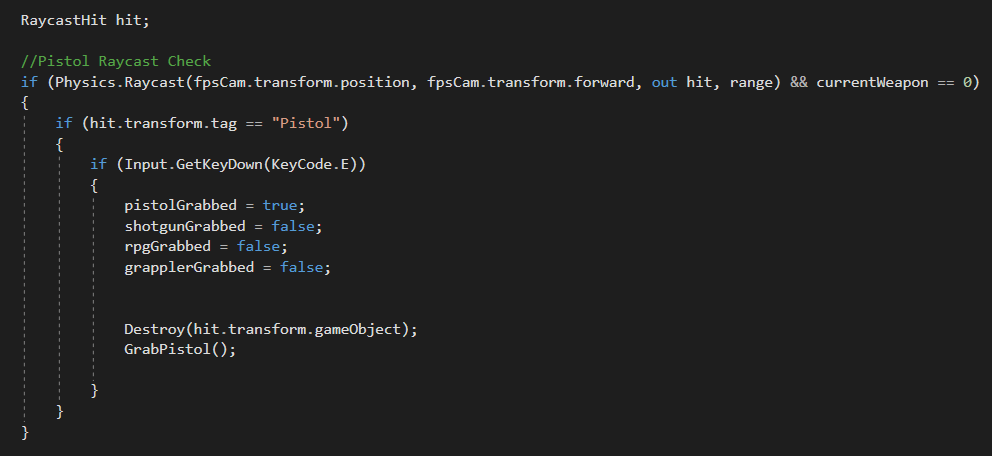
The way that I checked if the player is looking at a gun, which gun it is, and if they have a gun already equipped, is by casting a raycast directly from the players face, pointing out in the forward vector of the camera.
This weaponry grab is attached to the player, so that it works only when the player is active.
To check if a gun is equipped, each gun has a number ID, with bare hands being 0. This way, whenever a gun is equipped, this number changes to either 1,2 or 3. Then switches back to 0 whenever the gun drop function is called. So in the if function statement, it also checks if the WeaponEquipped ID is at 0.
Each weapon has its own raycast
When the E button has been pressed, it destroys the world object of the weapon that the player is looking at, then calls the equivalent function for grabbing that specific weapon.
The GrabPistol function
When the player grabs a weapon, it switched the currentWeapon ID to that weapons id, and spawns the usable gun into the players hand using the instantiate function. It then also becomes parented to the fps camera, so it rotates with the view.
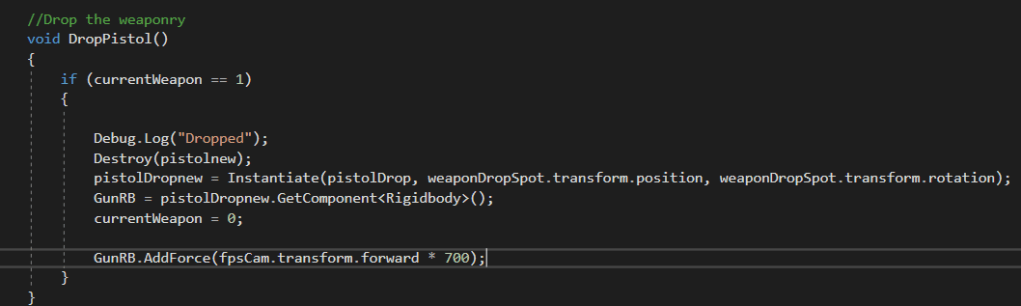
The Drop Function
When the player drops a weapon, the gun is destroyed in the players hands, then the weapon ID is reset to be bare hands. The gun in floor mode is spawned then given a force push as if the player is thrown. This entire script then loops and repeats whenever guns are grabbed, dropped or used.
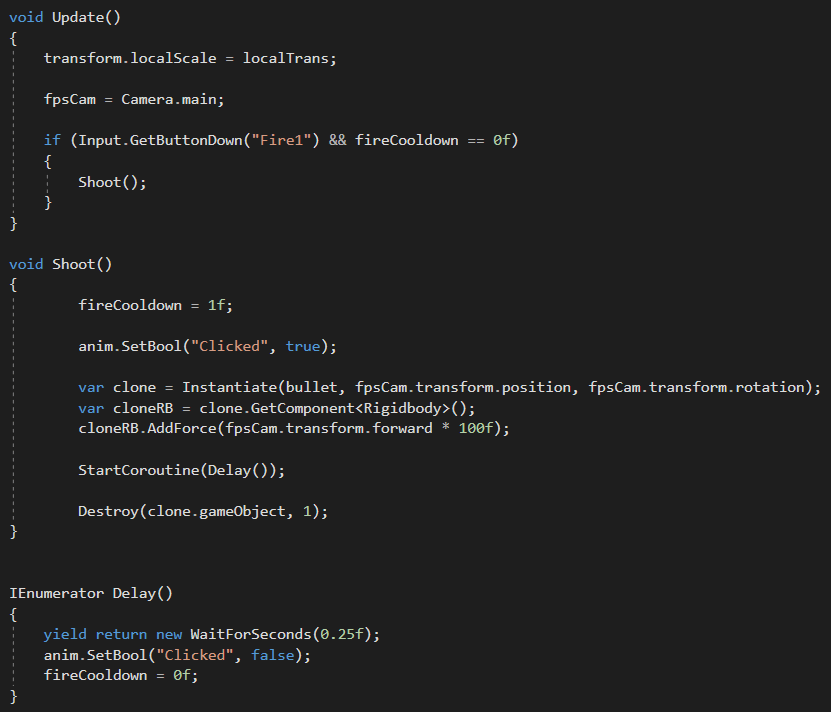
This script is how the pistol shoots and sends out projectiles bullets. Each gun has similar code, but is changed slightly for the variation of weapon it comes from. When the mouse button is clicked, the gun fires a single projectile at a certain force velocity. A fire delay is then set inside of a co-routine, so that the player can’t spam fire fast and break the realism of the weaponry. The bullets then destroy themselves after 1 second, to add the idea of some sort of range, so that pistols can’t snipe people.
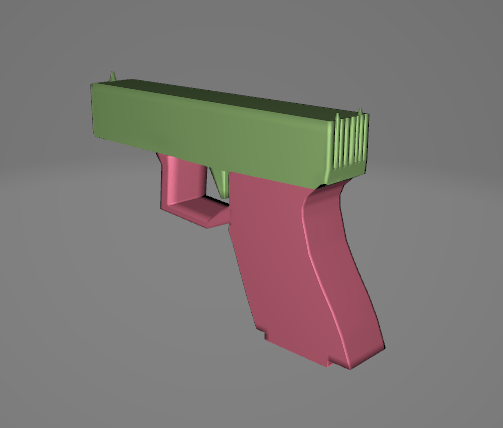
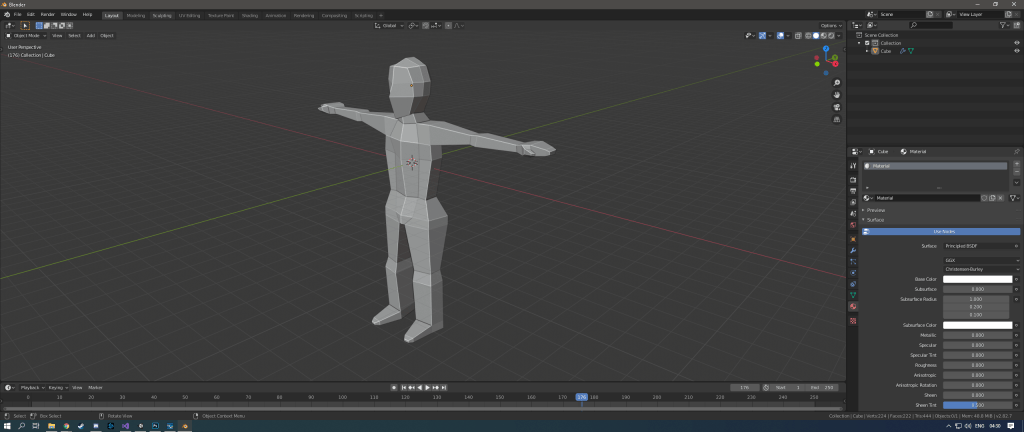
Once I had the basic player movement completed, I moved onto trying my hand at 3D Modelling for the first time in a very long time. I had about 1 hour of accumulated experience inside of 3DS Max and 20 minutes in Blender before I started. So I began by looking at Youtube Channels such as CG Geek and their related channels to get a basic understanding of how 3D Modelling works inside of Blender 2.82.
After looking at a Low poly hand tutorial, as well as a low poly character tutorial, I began work on attempting a Pistol, Shotgun, Grenade Launcher and a Player character. I decided not to create FPS Hands to make a sort of feel that would be similar to what you see on games such as SuperHot, with a floating gun.
My first creation was a Pistol, which ended up being just an L shaped Mesh with a curved top, which I changed with a new model I spent much longer on that I enjoyed more.
My Glock Attempt in 3D Models, with Material Colour IDS
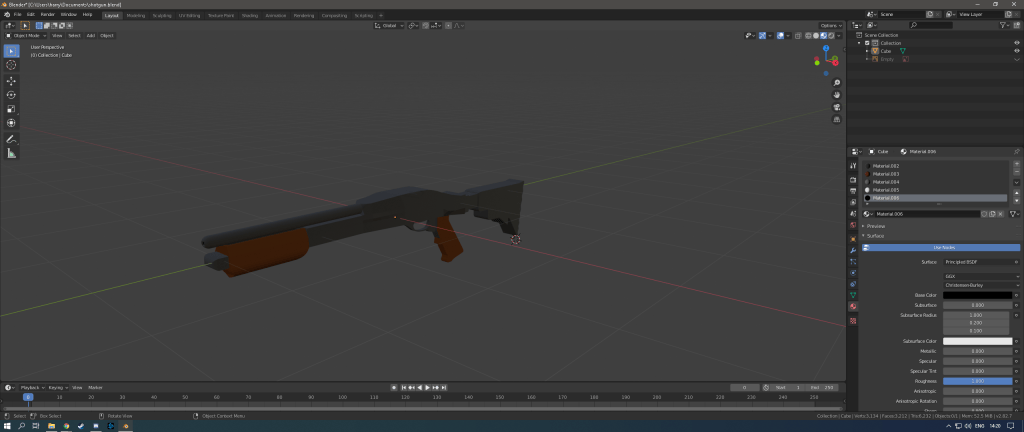
Once I made this, I began work on my Shotgun, trying out my skills using reference images, as well as all of the techniques I learned from Class and the tutorials that I was using online, making the following models:
The player model that the player and the enemies will be using
Once this character was created, I used Mixamo to rig the character and the default animations to create a movement animation script to give the character a bit more of a real feel to the character, so the shadow is no longer a static pill.
The result of the shotgun model creation in Blender
The shotgun is something I am proud of, being the first model I made that came out almost exactly how I wanted it to.
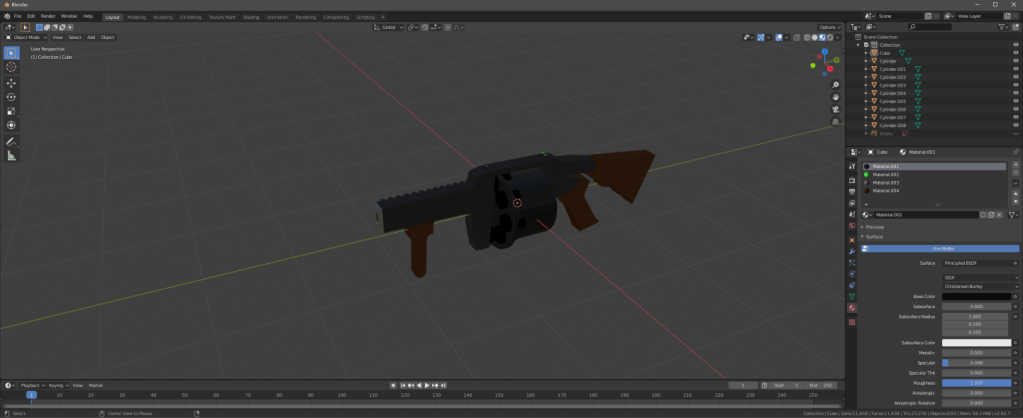
The model of the Combat MGL that I made to replace the stock model I made out of meshes in Unity
These models were made inside of Blender 2.8 using Reference images on a plane, Bevel, Embossing and subdivision, so that I could change where the vertices were to make more accurate models.
After the team had all of the communications ready to develop the game, we had to start creating the game that we had decided on with the presentation. A parkour movement based game with time trials. This idea, as state in the PowerPoint, was inspired by multiple games, such as Mirrors Edge, Dying Light and Superhot.
I started off by creating a basic player movement script. I checked online to see the popular way of creating it, either using a RigidBody for physics based movement or a Player Controller for more locked and easier to implement movement. I used Brackeys tutorial to try out a Player Controller based movement script, but used a combination of “Dani” and “Alexander Zotov” on YouTube to create a player movement script that takes advantage of a RigidBody, Colliders and a Ground Check.
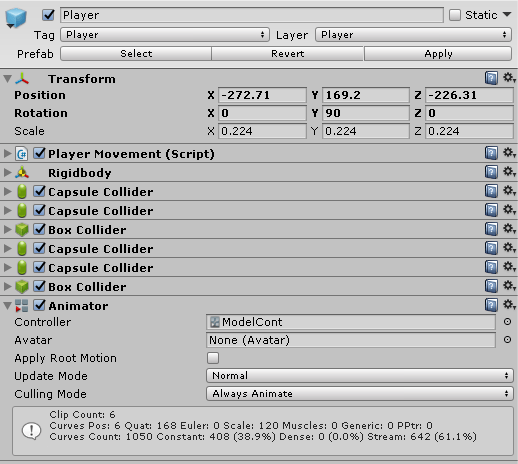
The players inspection panel, with the colliders and rigidbody, as well as the script that moves the character.
Once I had this working inside of Unity 2019, I had to begin to change the code in certain ways so that I could downgrade the scripts to Unity 2017 for the rest of the team to be compatible with.
After that, I decided that the best thing to add to next, is the most basic, but fun parkour movement. “Wall Running”. I experimented with a couple of ideas based off of my own inspiration, dealing with a box collider on either side of my body to deal with left and right collision, but decided that this would not be the best as it could become problematic due to whenever the player is scaled during a slide, so i began to do research into Raycasting inside of Unity.
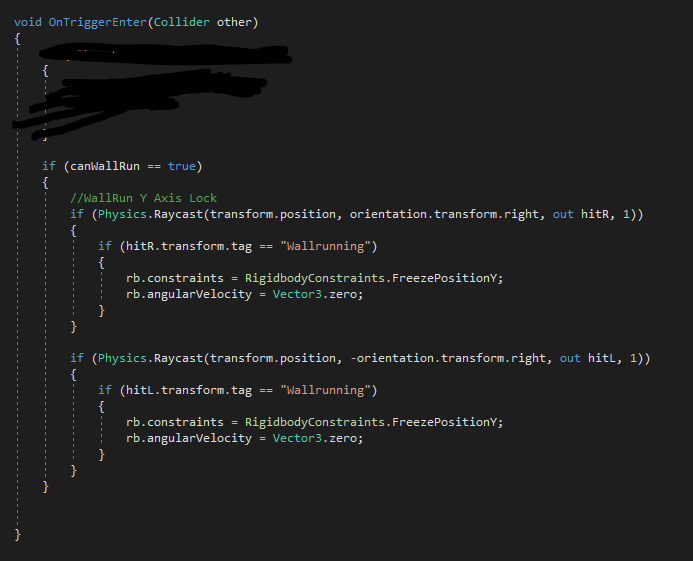
After some testing, I used a raycast, originating from the centre of my body, stored inside of a variable, pointing outwards, using transform.right and !transform.right, to port 2 separate raycasts on either side of my body, telling me whether a wallrun has been activated on my left or right, so that I can activate the wallrun animation and script for either wall and only one at a time.
The initial detection as soon as a wall is detectedThe actual code that goes into setting the orientation and position of the character, locking certain aspects and disabling gravity
This allowed me to animate the player camera with a small tilted rotation to make the wall run feel a lot more natural, rather than just being glued to a wall by your hip. It also allowed me to make sure that my scripts always knew the orientation of my character no matter where they were.
When we got assigned into groups, I began to create different paths that we could communicate down into, so that we were never in the dark about what we are doing, so making sure that everyone knew what they were doing was a priority for me.
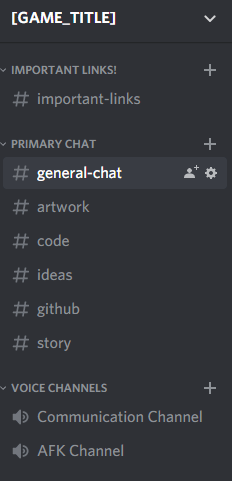
I started off by creating a Discord Server, gathering all the team members into the server and giving them all administrator privileges, then creating different servers to organise our communication, making channels such as general, art, code and ideas, as well as a few others so that we can all talk and find stuff that we need when we need it. This also works as a secondary piece of evidence when I need to show how we worked and decided what to do.
The Channel layout of the new Discord Group, with all of the channels that I have created.
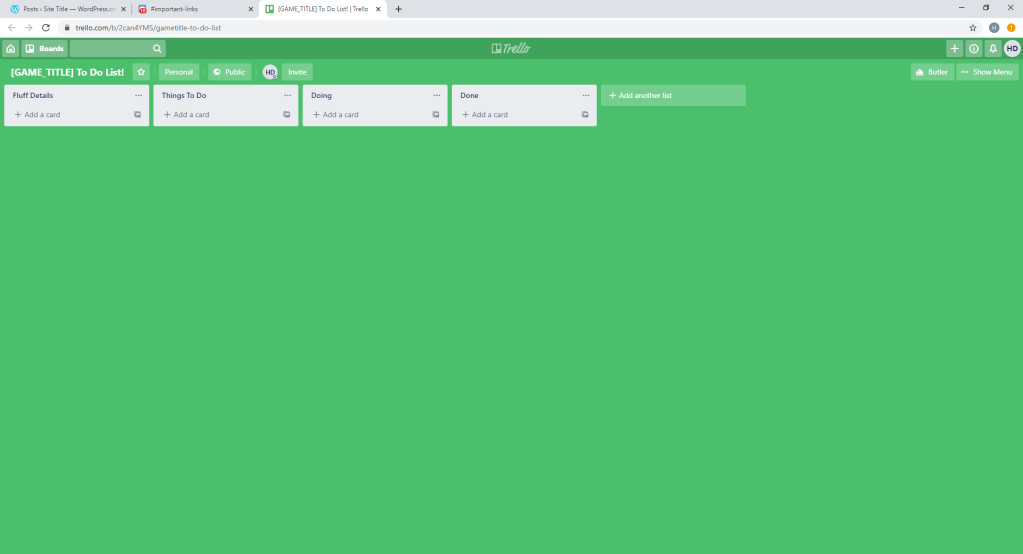
Once everyone was in the group, I began to make a Trello Page, an interactive to do list so that everyone knows what is done and what is not done, so that nothing ever gets created twice, This again helps for involvement and organisation of the group, as you can colour code what you wish to do, so everyone knows that it needs to be done, when and by who. That way, if that person fails to complete it, it can be done before it becomes a problem that it has not been done.
The trello page, where we can add and remove different tasks that we need to do, as well as drag them around to different lists to indicate what has or hasnt been done.
Once that all of that was done, we began to discuss ideas about the type of game that we wanted to create, as well as the scope of the game itself, as we did not wish to make the game to big and end the assessment with a game that was unfinished. Once we had a few ideas that were comfortable with, I loaded up Unity 2017 and began to code a basic player movement script that we could feel out.
When I began to code the player script, I took inspiration from some of my past games in Unity, as well as two Youtube Channels that I look for coding help, called “Brackeys” as well as ” Blackthornprod”. I coded a basic look script so that the mouse works, as well as a basic movement and gravity system.